You can create a menu from Appearance->Menus
Setting the main site menu
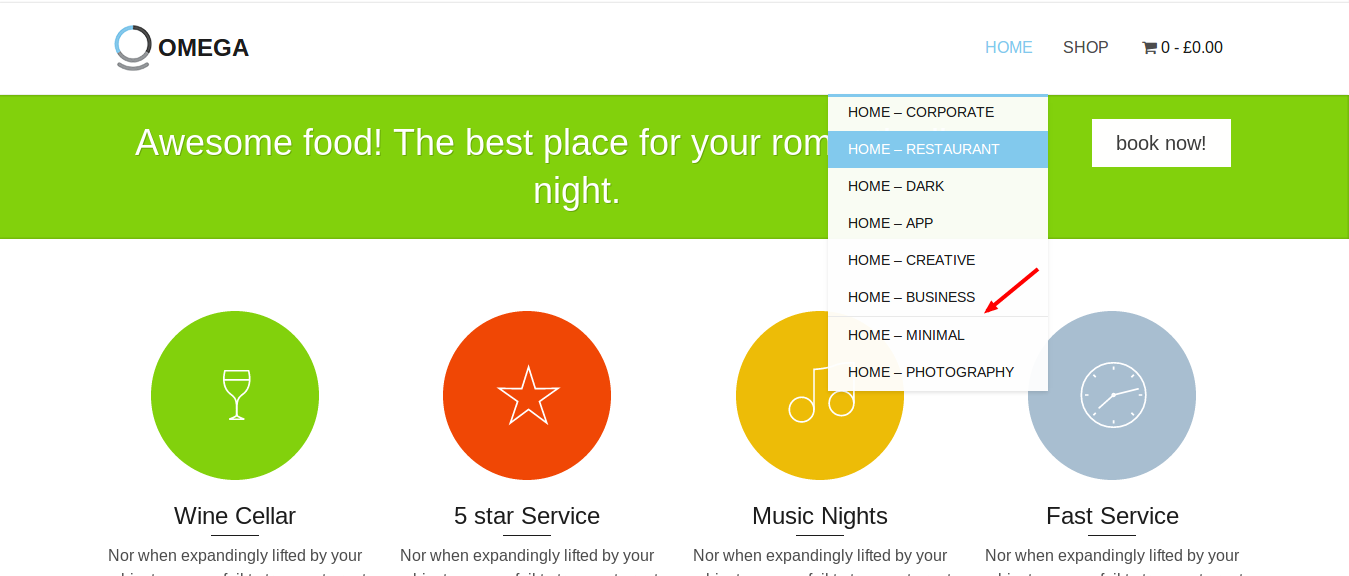
To set up a main menu on Omega theme (assuming you have created a menu or imported the demo content) click on Appearance>Menus. Select your main menu from the drop down list.
This section will allow you to setup your site header. You can choose from two different types of header to use on your site, and adjust the header height to allow room for your logo.

- Header type: Sets the type of header to use at the top of your site and its behaviour.
- Menu height: Use this slider to adjust the menu height. Ideal if you want to adjust the height to fit your logo.
- Sub Menu Width: Use this to adjust the width of your drop down menus. Ideal if you have pages with large names.
- Menu Change Scroll Point: Point in pixels after the page scrolls that will trigger the menu to change shape / colour.
- Menu Height After Scroll Point: Use this slider to adjust the menu height after menu has scrolled.
- Hover menu: Choose between menu that will open when you click or hover (desktop only option since mobile devices will always use touch).
- Menu Underline: Underline of the menu items when selected.
- Hover menu delay: Delay in seconds before the hover menu closes after moving mouse off the menu.
- Full Width Menu: Choose between normal or fullwidth menu.
- Menu Swatch: Choose a color swatch for the menu.
- Top Bar Swatch: Choose a color swatch for the Top Bar when you have a Header Type Top Bar or Combo.
- Capitalization: Enable-disable automatic capitalization in header logo and menus.
To set up a main menu on Omega theme (assuming you have created a menu or imported the demo content) click on Appearance>Menus. Select your main menu from the drop down list.
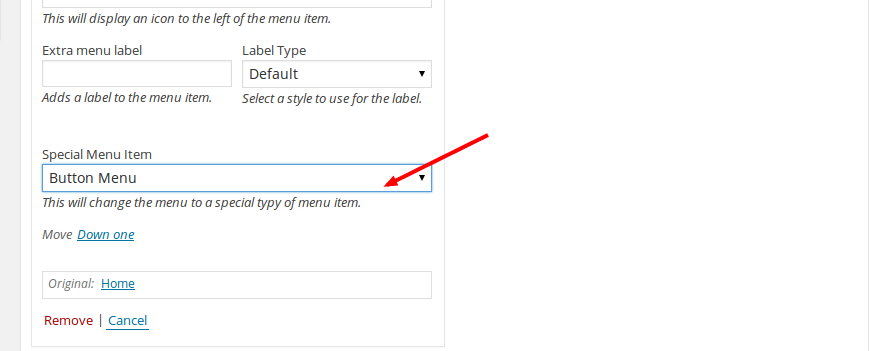
If you want to make a menu item stand out from the others, you can highlight it, giving it a button-like view. Follow these simple steps
- Go to Appearance->Menus menu.
- Locate the menu item that you want and expand it.
- From the Special Menu Item dropdown list select the Button Menu option.
- Save the menu.

If you would like to have a tansparent highlight effect, select the Bordered Button Menu option instead.

The Button Menu and Bordered Button Menu options only apply on the root menu items.
To add a label next to a menu item follow these steps.
- Expand the menu item by clicking on the small arrow on the right side of the item.
- Type inside the Extra menu label field the name of the label. Then, you can choose a label type from the Label Type dropdown for e.g Success.
- Hit Save Menu.


To add an icon next to a menu item follow these steps.
- Expand the menu item by clicking on the small arrow on the right side of the item.
- From the Menu Icon dropdown choose the icon that you wish.
- Hit Save Menu.

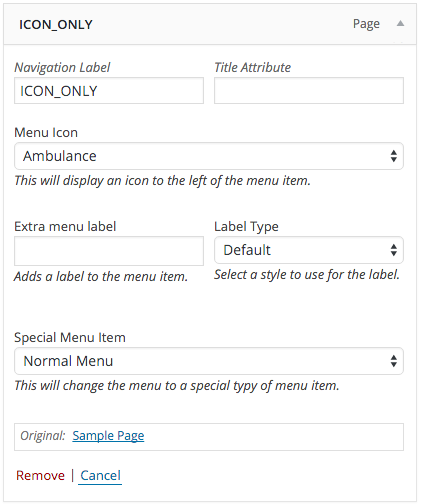
WordPress requires that all menu items have a title, otherwise they will not be saved. To get around this we have created a special filter to allow you to create a menu with no title and just an icon. Here is how
- Add a new Menu Item to your menu from the left sidebar on the Appearance -> Menus page.
- Expand the menu item by clicking on the small arrow on the right side of the item.
- Enter ICON_ONLY as your Navigation Label.
- Select a menu icon from the drop down menu.
- Hit Save Menu.
To add a separator between menu items follow these steps.
- Click on the accordion item Links on the left hand side of the page.
- Fill in the URL field with a simple #.
- Hit Add to Menu.
- Move the new item to the place of the menu where you want the divider to be placed at.
- Expand the menu item by clicking on the small arrow on the right side of the item.
- From the Special Menu Item dropdown option choose the Divider option.
- Hit Save Menu.

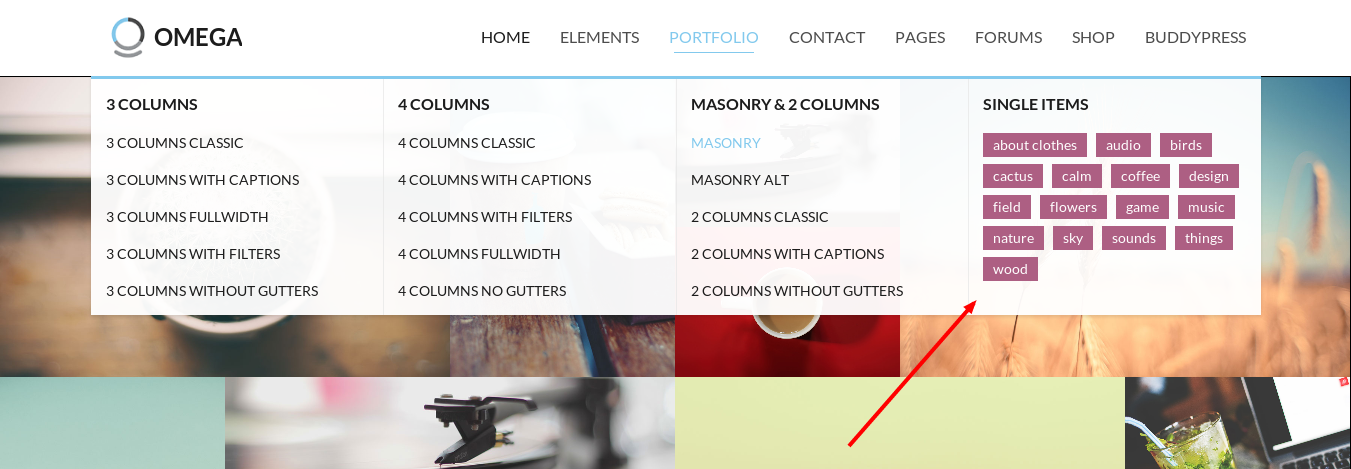
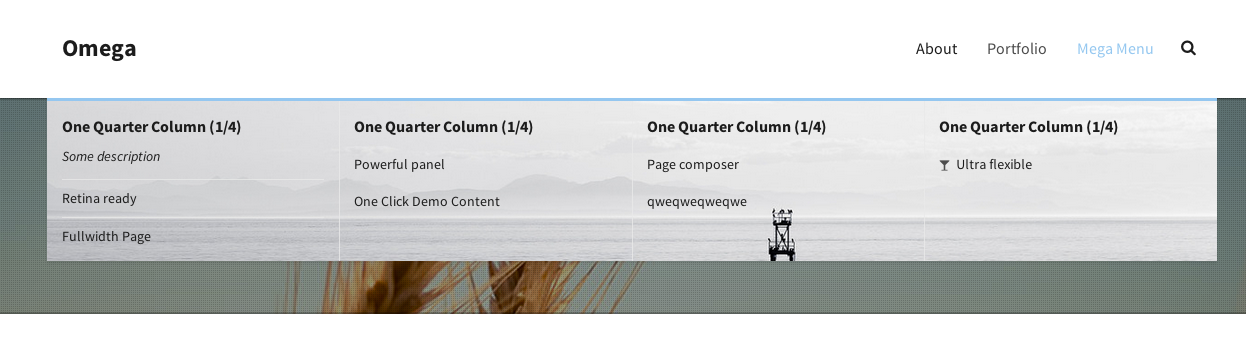
A Mega Menu is a menu that is designed to hold a large amount of pages, organised in columns. Follow these simple steps to build it in Omega.
- Go to Appearance->Menus.
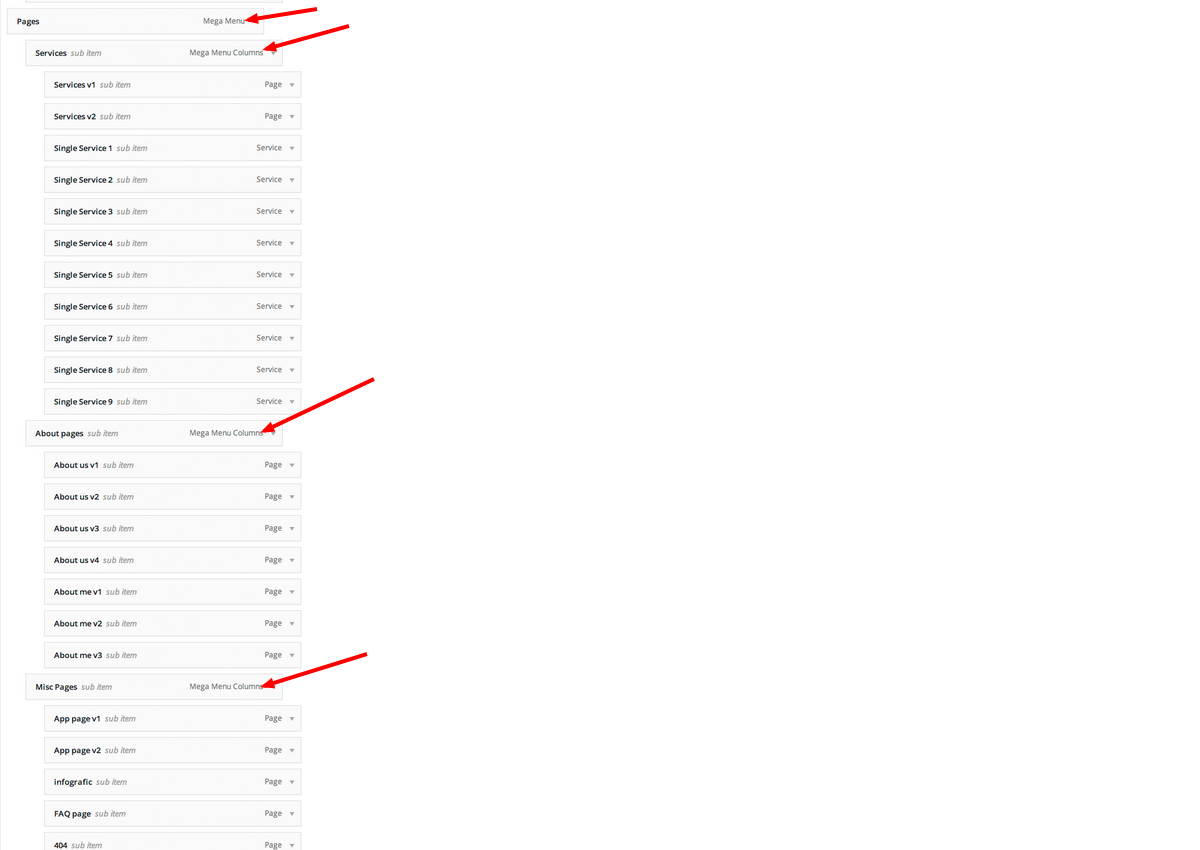
- Locate the Screen Options tab and tick the Mega Menu and Mega Menu Columns as shown below.
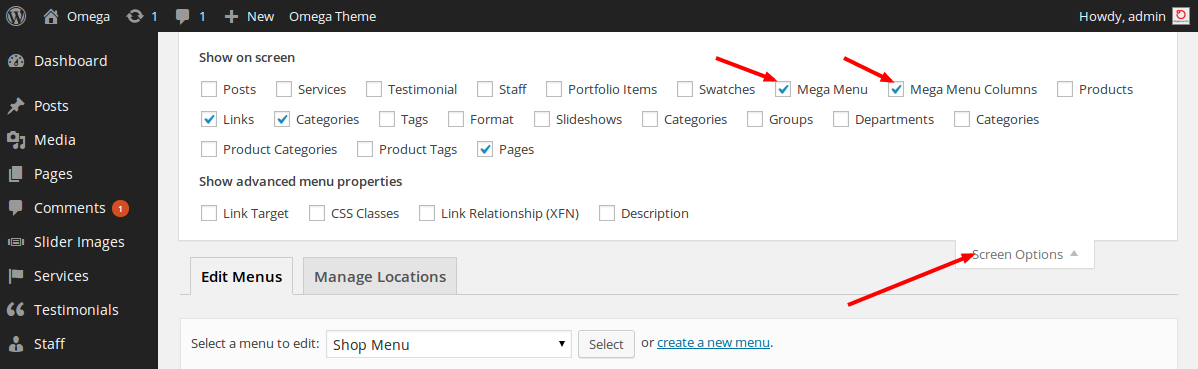
- On the accordion on the left of the Menu Structure you should now see two extra options, Mega Menu and Mega Menu Columns. Click on the Mega Menu to expand. Add the Mega Menu as
if it was a page by pressing Add to Menu.
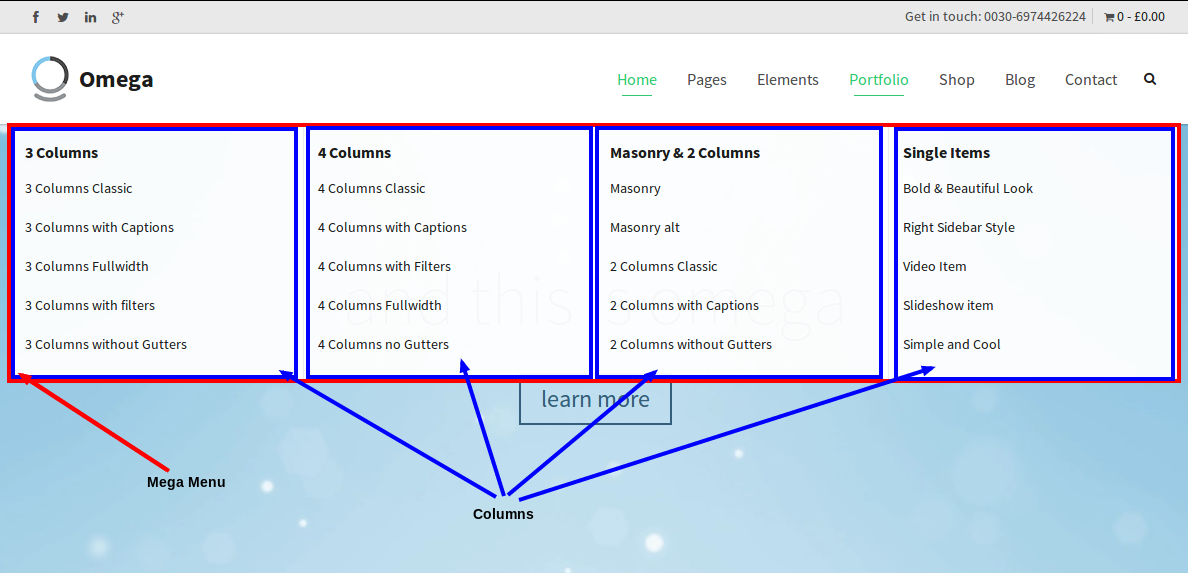
- Now that you have the Mega Menu menu item, time to put the columns that will hold the menu items. Decide whether you want three or four columns. Add the one that you wish as a submenu of the Mega Menu. The Navigation Label of
each column will be the name of the column on the menu.
- Do the same for as many columns as you wish to add.
- Add pages to each column as a submenu. See the images below to get an idea.
Should you have the menu set to work on hover, we have added an extra functionality, which allows you to make the mega-menu items clickable. You can set those links if you follow these simple steps.
- Go to Appearance->Menus.
- Expand the Mega Menu item that you want to make linkable and type the full URL in the URL field, as shown in the screenshot below.
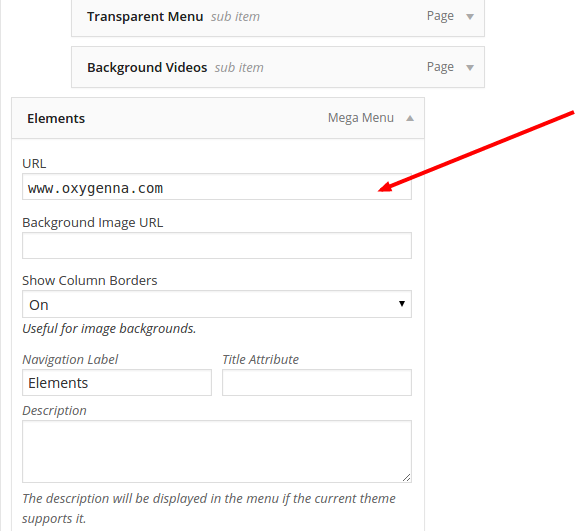
- Save the menu.
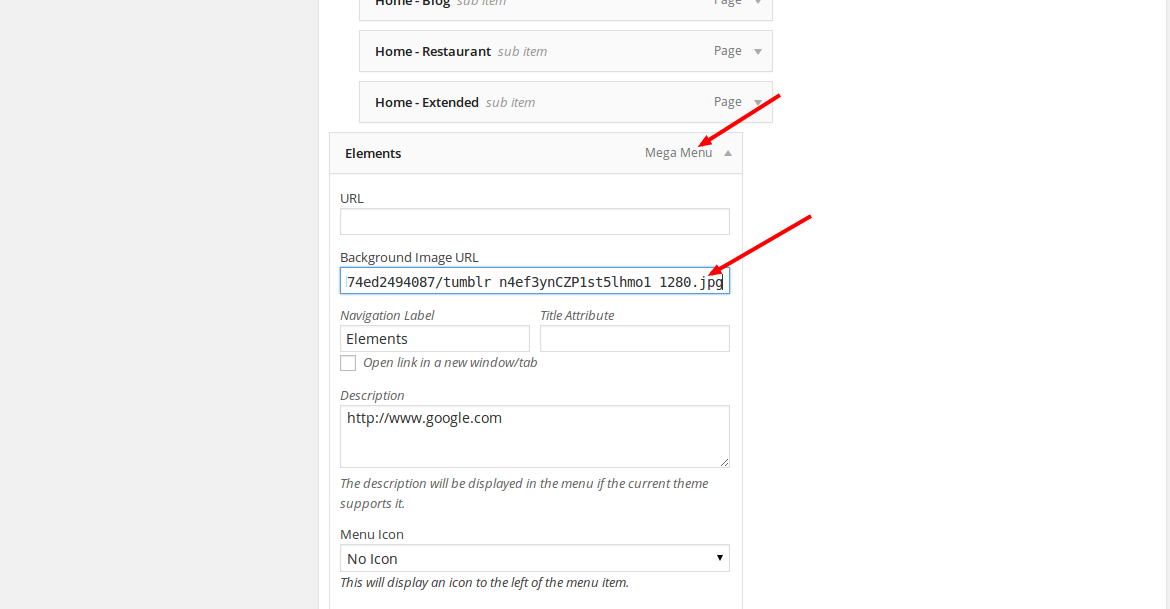
You can add an image backround to Mega Menus by following these simple steps.
- Find the url of the image that you want to use as a background.
- Go to Appearance->Menus and edit the menu.
- Locate the Mega Menu item and expand it.
- Add the url of the image to the Background Image URL field.
- Save the menu
A new feature that Omega offers is the ability to add widgets to Mega Menu columns. If you want to use a Mega Menu column as a widget position follow these simple steps
- Go to Appearance->Menus and edit the menu.
- Locate the Mega Menu Columns item and expand it.
- From the Use Column As Widget dropdown list select the On option.
- Save the menu.
- Go to Appearance->Widgets. A new widget position should now exist named after the name of the column.
- Add a widget and you are done!