Woocommerce
How to setup your shop
How to setup your shop
WooCommerce Plugin Page - This is the official WooCommerce plugin page
WooCommerce Documentation - This is the WooCommerce Online documenation created by WooThemes
WooComerce Community Forums - This is the community forum for WooCommerce plugin created by WooThemes
WooComerce Built-In Shortcodes - These are the included shortcodes for WooCommerce, our custom shortcodes are not included in this
You can download the Woocommerce plugin from here. You can then install it from the Plugins->Add New menu as you would install any plugin. Alternatively, you can install it from Appearance->Install Plugins. Once installed, activate it from the same page.
You can install the demo content for the Shop from Omega->Demo Content Setup. Click on the
WooCommerce Shop Contenttickbox.
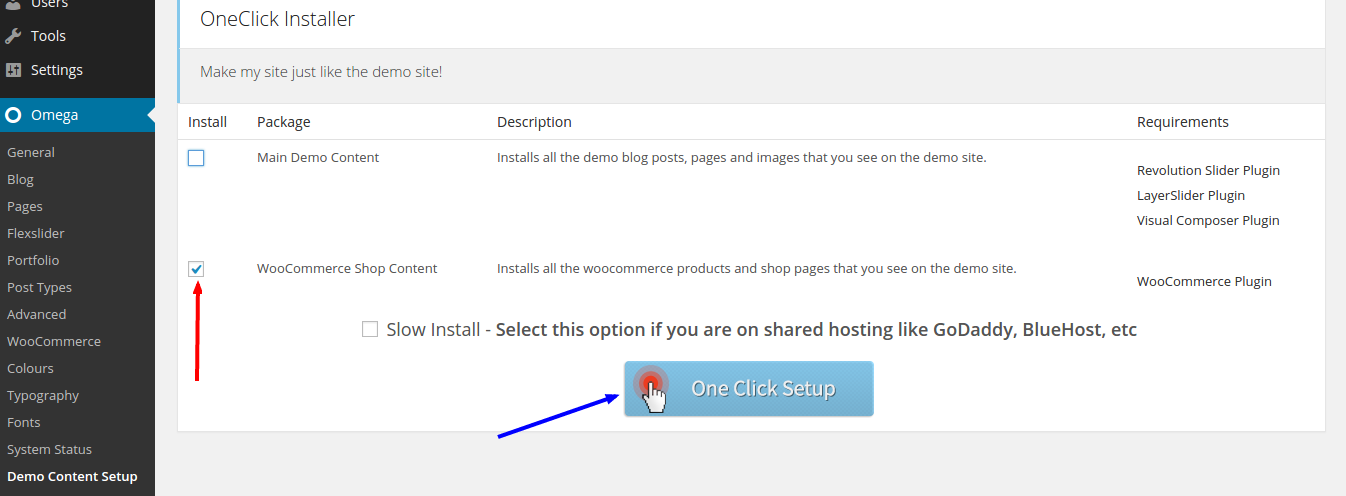
Hit One Click Setupand wait patiently for the install procedure to finish.
Change the look of your shop page with these options.
You can set the shop layout from Omega->WooCommerce, from the Shop Pageoptions section, by setting the Shop Layoutoption.
You can set the number of columns used on shop page from Omega->WooCommerce, from the Shop Pageoptions section, by setting the Shop Page Columnsoption.
Change the look of your shop page with these options.
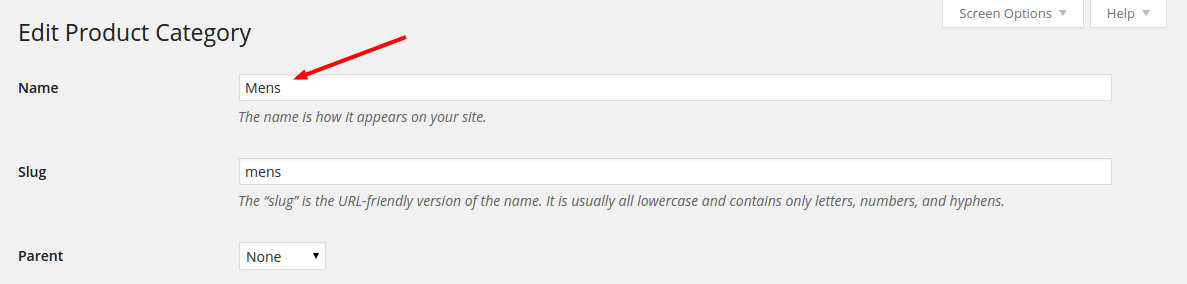
You can set a product category's header by editing that category and changing the name of that category
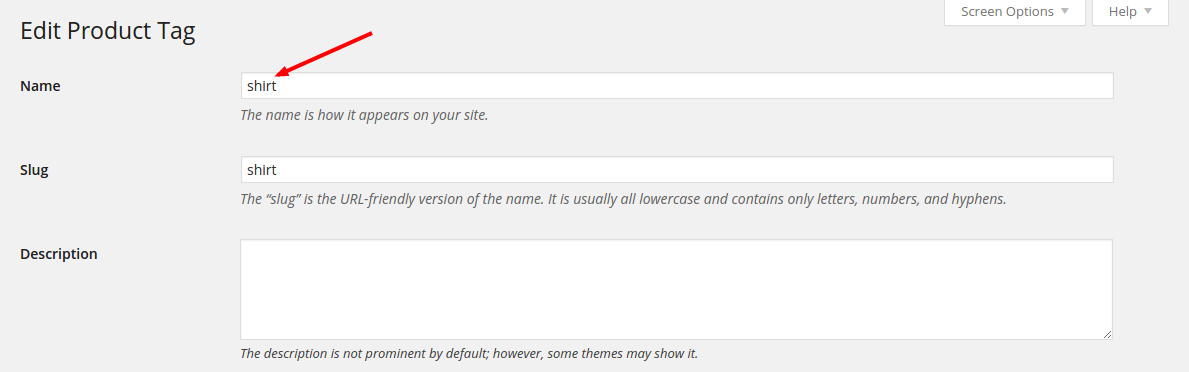
You can set a product tag's header by editing that tag and changing the name of that tag
You can set the social links for the shop from Omega->WooCommerce, from the Product Detailsoptions section, by setting the Social Networksoption.
You can set the product slideshow options for the shop from Omega->WooCommerce, from the Product Slideshowoptions section.
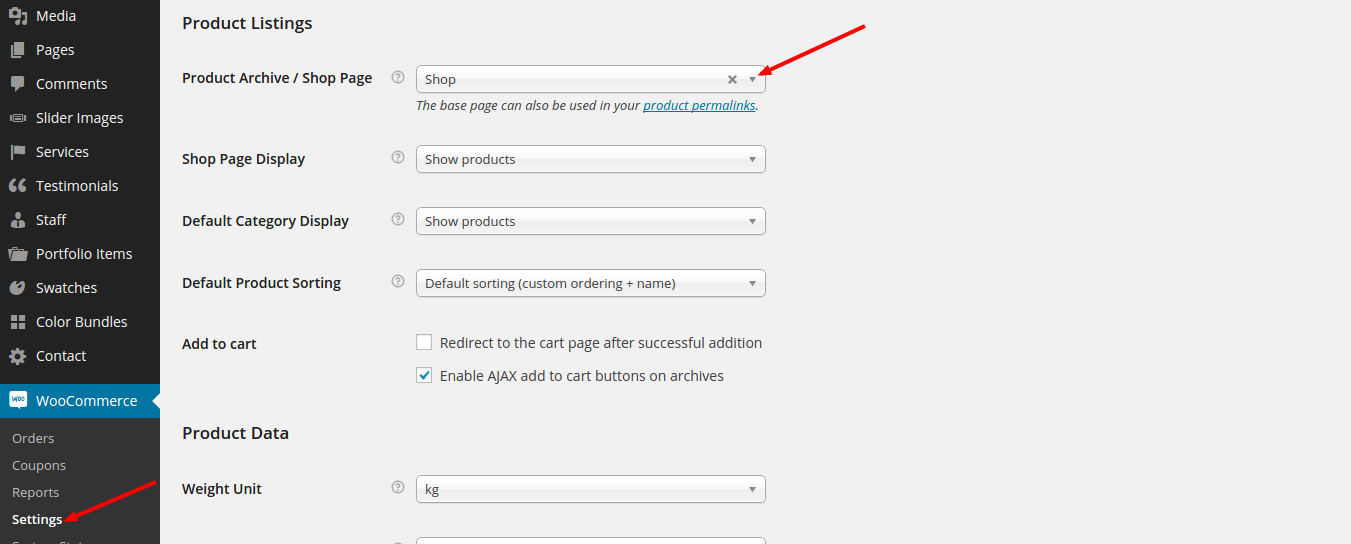
You can set the page that you want to use as your shop page from Woocommerce->Settings, under the
Productstab. From the
Product Listingssection, set the
Product Archive / Shop Pageoption to be the page that you want to use as shop page.
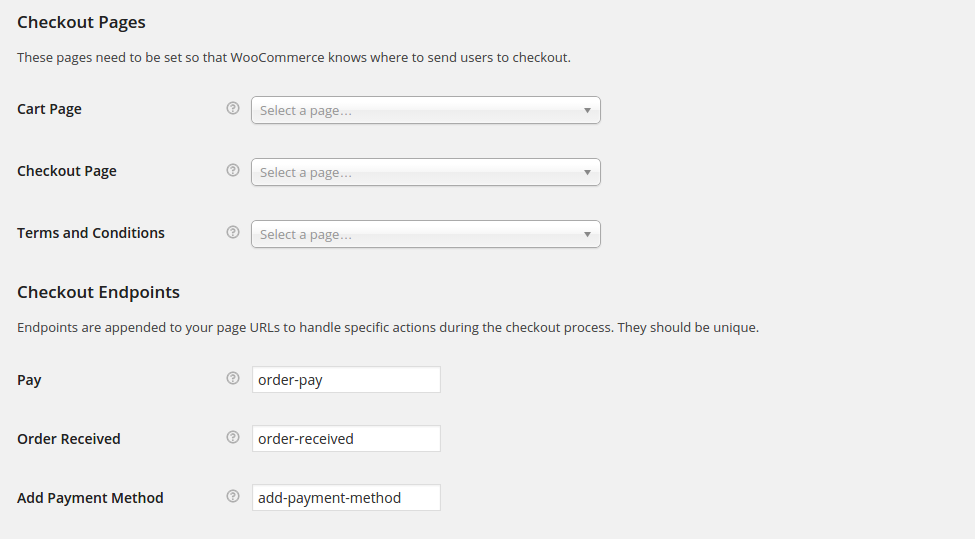
Also, you can set your checkout pages from
Checkouttab, from the
Checkout Pagesoptions section. Set a page for the
Cart,
Checkout Pageand
Terms and Conditions. In addition, you can set your
Checkout endpointsfrom the same page.
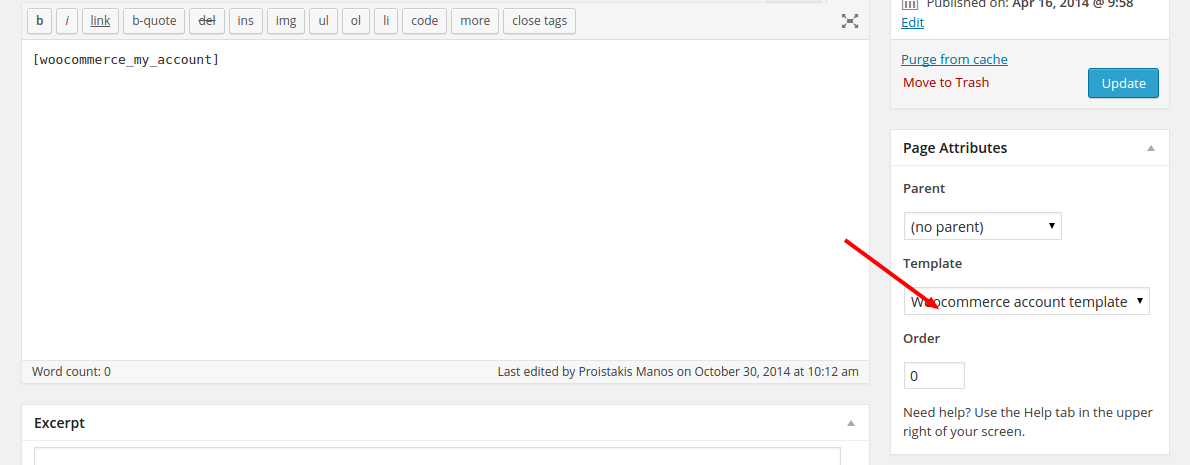
Similarly, you can set the Accountpage and endpoints from the Accountstab.
The account page can have a menu on the left side of the page, that helps the user navigate through his account settings easier. To achieve this, you need to assign the
Woocommerce account templateto the page that you use as account page. To do that, edit that page and from the
Page Attributesmetabox under the
Updatebutton, set the aforementioned template.